
Contents | Start | End | Previous: Chapter 15: Working With Boxes | Next: Chapter 17: Adding Narration To Your Book
This chapter describes the use of ‘tag objects’, which allow you to add markup that you can’t achieve with styles. You can skip this chapter if your ebook creation needs are simple.
Jutoh 2 introduces the notion of tag objects, for advanced markup such as grouping content into sections, indication of voice gender for spans of text, marking emphasised text, and so on. Tag objects normally have a close relationship with an equivalent HTML tag, but this may not always be the case.
A tag object always has a start and an end; Jutoh will check whether the tags match up when compiling a book. Here’s an example of using an ‘em’ tag to mark an emphasised word without explicitly using italic formatting:

An example of em (emphasis) tag
This guide doesn’t go into details of how exactly to use individual tags. However you can find out quite quickly by searching online for the syntax of particular tags, attributes and CSS properties.
Even if you don’t add any tag objects yourself, if you use Jutoh’s accessibility features, Jutoh may be inserting tag objects during code generation, and when looking at the generated HTML code, it may be helpful to bear in mind this process.
You can insert a tag object either using the Object Palette, or by using the command Format | Insert | Object (Shift+Ctrl+P) which shows the Object Selection dialog from which you can select a tag object (as well other kinds of object such as text boxes and tables). If you have selected content first, the tags will be placed around the selection. Right-click (or control-click on Mac OS X) to show a menu for inserting just a start or end tag.
Tag objects that relate to a block of content (for example the ‘section’ tag) should be placed in their own paragraph if possible. The containing paragraph will be ignored when the code is generated. Or, place the start tag at the start of a paragraph, and the end tag at the end of another paragraph.
You can copy and delete object tags just like ordinary text.
This is what the Object Palette looks like:
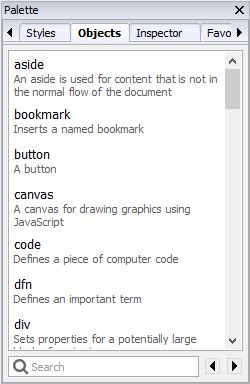
The Object Palette
You can type in the Search field to find a tag object, and press return to insert the selected object into the editor. Or just double-click on an object; or right-click (control-click on Mac) and choose Insert, Insert Start Tag, or Insert End Tag.
A tag object consists of a tag name, a set of attributes, and a set of CSS-like ‘advanced’ properties that are not dealt with via formatting dialogs. Like other objects, paragraphs, and text fragments, a tag object can have an identifier, Epub type and custom attributes, amongst others. CSS properties such as Voice family are output inline to the ‘style’ attribute; or you can define regular and advanced properties in a Jutoh style so that they are defined in a CSS style instead of inline.
Currently, only a few extra CSS properties are listed in the Advanced tab. These will be added in future releases, but meanwhile you can use Custom properties to add arbitrary CSS properties. Be aware, though, that Jutoh will not know which Epub version these custom properties are valid for, so will output them to both Epub 2 and Epub 3 files unless the tag object itself is valid for Epub 3 only.
Tag objects will only have an effect on the generated book if:
1. The format is HTML-based, such as HTML, Epub and Mobipocket, and
2. the tag and its properties and attributes are compatible with current settings, in particular the Epub version setting.
So unless you use custom attributes and properties that are not checked by Jutoh, you don’t have to worry about Jutoh generating inappropriate code, even if the document is optimized for Epub 3 using HTML5 tags.
If you use tag objects, it is easier to make mistakes than when using straightforward editing and formatting functionality. So be sure to use Jutoh’s Check functionality to invoke EpubCheck and confirm that the HTML/Epub is valid.
You can create custom tag objects per project that appear in the object palette and which are aliases for other tag objects, potentially with different default attributes and properties. For example, you might prefer to mark text with a ‘female’ tag that has a preset Voice family property, rather than create a ‘span’ tag and manually set Voice family to ‘young female’.
To do this, right-click over a tag object and choose Make Custom Tag from the popup menu. If this command is not available, it means that the chosen object is not a tag object.
Say we wanted to create a new tag ‘female’, with which we will mark up certain content to be spoken in a female voice. Customise the ‘span’ tag; enter the name ‘female’, click on OK and then in the Advanced tab of the Object Properties dialog, enter ‘young female’ into the Voice family property. Now click on OK.
The ‘female’ tag now appears in the object palette. Select some text in your document, and double-click on the ‘female’ object. Tags will appear around the selected text. If you click on the start tag, you can confirm that in the Advanced tab of the properties dialog, the Voice family property contains the value you entered as a default value. When writing to an Epub 3 file, the custom tag will be written as a ‘span’ tag with appropriate properties.
Note that custom tag definitions are associated with the project, so you will need to use a template containing the definitions if you wish to create multiple files with the same custom tag definitions. This ensures that custom tag definitions do not get lost when projects are transferred to other computers.
Now you have an idea of how to manipulate tag objects, you can use this knowledge when marking up a document for narration synchronisation – the subject of the next chapter.
Contents | Start | End | Previous: Chapter 15: Working With Boxes | Next: Chapter 17: Adding Narration To Your Book