
Contents | Start | End | Previous: Chapter 9: Understanding Configurations | Next: Chapter 11: Working With Indexes
In addition to text, Jutoh supports pictures (also referred to as ‘images’ within the Jutoh user interface). Jutoh has a variety of methods to convert and resize pictures; this chapter tells you all you need to know.
To show pictures in your book, you can paste them into a page, or choose Format | Insert | Picture (Shift+Ctrl+C). Inserting the picture will show a browser that displays thumbnails of all the pictures in a folder.
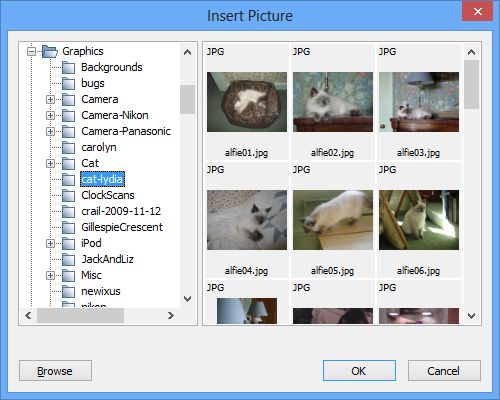
The picture browser dialog
If the inserted or pasted image width is larger than the one specified in Resize images to max, in Import Preferences, the image will be resized before insertion into the project.
You can use these formats in Jutoh:
PNG – good for high-quality artwork that should not be compressed. PNGs tend to take up a bit more space than JPEGs, sometimes a lot more space depending on how the image was saved.
JPEG – a ‘lossy’ format good for keeping file size down, and best for photographs. Not so good for diagrams or images containing text, since compression artefacts can be visible.
GIF – an older format similar to PNG. Jutoh cannot flatten this format (remove transparency) except by converting to JPEG.
TIFF – a popular general-purpose file format that usually produces larger files than JPEG.
By default, Jutoh will convert non-JPEG image files to JPEG when compiling an ebook – see Image export to ebooks below for more details. In the case of TIFF images, you need Jutoh to convert them to JPEG since Epub and Mobipocket do not support TIFF.
A pasted image will always be inserted as a PNG. If you want to insert an image as a particular type, such as JPEG, you can use Format | Insert | Picture to insert it as a file, instead.
Note that separate image documents in your project (created via Document | Add Image Document or the toolbar new document command) are not included in your ebooks. These documents are purely to help you organize pictures that might or might not be pasted into the book at some point.
An image usually takes up a character position in the editor; if you have one image on its own in a paragraph you can apply paragraph formatting to make it left-aligned, right-aligned or centred. If you want text to wrap around it, set the left or right floating mode.
To add a hyperlink from an image to a page or web site, select the image and use the appropriate hyperlink command. Select the image (for example by going to the position to the left of it, then holding down shift and pressing the right arrow key) and then use the Format | Insert | URL or Format | Insert | Link to Page command. If a URL is inserted into the text instead of being applied to the image, you failed to select the image.
To edit picture properties, click on the picture or right-click (control-click on Mac) and choose Picture. The tabbed dialog illustrated below will be shown.
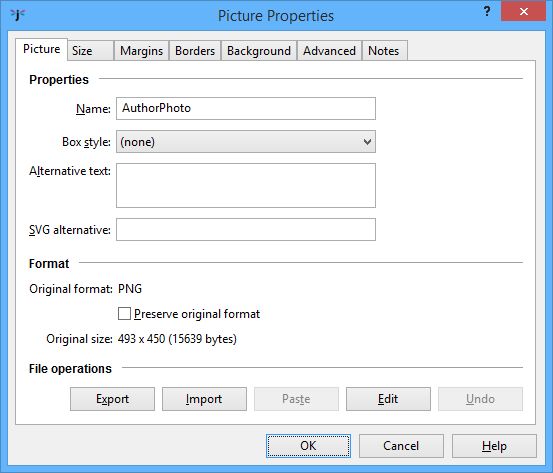
Editing picture properties
If the Name field has a value, it will be used to form the file name of the picture, and if several pictures have the same name, only the first will be output to the ebook. This means that you can repeat pictures without them taking extra space in the ebook file. Enable this behaviour by checking the configuration option Use specified image file names for all relevant configurations.
The Box style field can be used to assign a named style for specifying borders, margins and other box attributes without having to redo individual attributes for each image. If you specify a box style, and also change attributes individually, an automatic style will be generated based on the original style.
Alternative text is used to provide brief descriptive text that can be used in the absence of the ability to see the image.
SVG alternative is used to provide an SVG vector image instead of the bitmap image, and is discussed further below.
If you check Preserve original format, Jutoh will ignore configuration settings and always write the picture in the original format. This can be useful for making exceptions when most pictures are fine as compressed JPEGs, but some pictures don’t look good when compressed, such as line art or charts.
The controls under File operations allow you to export, import, paste and edit pictures without changing other properties. Edit will launch an external editor that has been set up using Configure Editors in Preferences/Helpers. Undo will undo import and paste operations performed within the dialog, but you cannot undo these operations once you close the dialog.
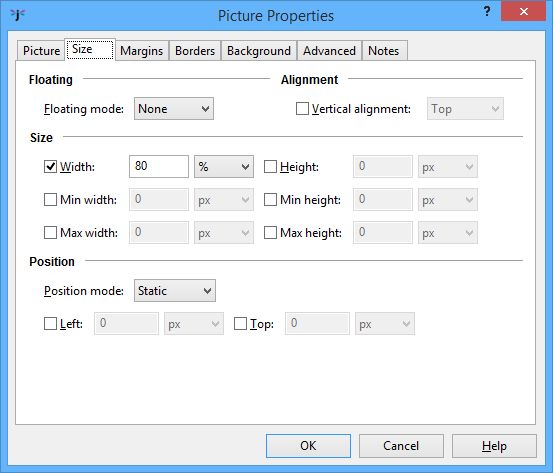
Clicking on the Size tab shows this page:
 `
`
Editing picture size properties
The first control in this page is Floating mode. Normally, a picture takes up a character position and will flow with the rest of the content. However, if you set Floating mode to ‘Left’ or ‘Right’, the picture will be shown next to other content. This behaviour can be shown within the Jutoh editor; it can be disabled to make it easier to see where in the content the image has actually been inserted. Use View | Preview Floating Objects (Alt+F10) to toggle this mode on and off.
The screenshot below shows a picture with a border and background colour floating to the right of other text. It impinges on both the paragraph it’s associated with, and the next paragraph (depending on the size of display). The picture has been set to have a width of 50% of the display width: set a proportional width for a floating object, to be sure that there will be sufficient space for it to float.
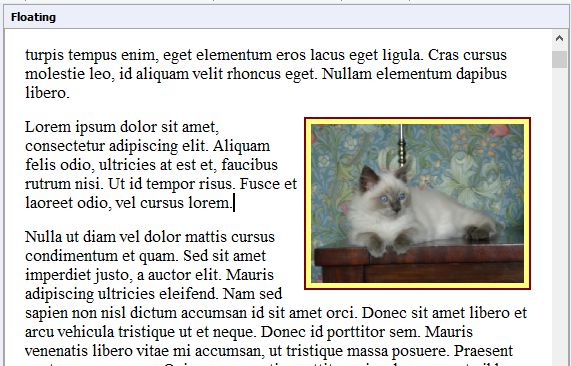
A picture floating to the right of text
Kindle KF7 doesn’t support floating pictures, but KF8 does, and so do all ereaders that use Epub, so floating pictures should work on all recent devices.
Next, we have Width and Height, which you can specify in pixels, cm or percentage, or not at all (the ereader will use the physical picture size to decide how big it should be on the screen). Minimum and maximum size can also be specified; it’s a good idea to specify a maximum size as a percentage to stop the picture exceeding the device display size. Percentage size is relative to the containing object: a text box, a table cell, else the overall display size.
You can specify just a width or just a height, and the ebook reader will keep the original aspect ratio. Unfortunately Apple Books does not support a relative (percentage) height.
Image size specified in the individual image properties (as distinct from the resizing done by Jutoh as described below) is respected by some viewers and not others. In particular, early Kindle devices will ignore the specified pixel width and height and will use the original resolution, scaled to fit if necessary, whereas newer versions of Kindle hardware and software take pixel, cm and percentage size specifications into account. However, KF8 still ignores the maximum width and height values, instead making sure the pictures don’t exceed the display size. Most Epub viewers recognise pixel, cm and percentage size specification.
Epub readers based on Adobe Digital Editions have a quirk: if you specify a maximum size without also specifying an actual size, it will interpret the maximum size as the actual size and potentially scale the image to fit the window. So be sure to specify a width or height if you set the maximum width or maximum height.
See also the advice below on using the Replace absolute widths configuration option to turn absolute widths into percentages at book compile time (not permanently).
Users sometimes ask what DPI (dots per inch) a picture should be saved in before inserting it into Jutoh. When adding pictures to Jutoh, it’s more helpful to think in terms of pixels. You need to balance the need for an adequate resolution so the image doesn’t appear pixelated on high-resolution devices, versus the need to keep the ebook file size within reasonable limits. For a photograph to be displayed full-width on the ereader device, you might consider inserting images with widths of around 1000 pixels. You can always use Maximum image width in your configurations to limit the physical image sizes in the generated ebook, perhaps setting different maximum sizes depending on ebook format. This resizes the actual image files in the ebook, changing the resolution, so is unrelated to the maximum size settings in an individual picture’s properties. See also the recommendations on image sizes for individual platforms such as Apple Books and Kindle.
You will only rarely, if ever, need to change the Position mode and related controls. The position mode determines how positioning is specified, and currently Jutoh only supports ‘Static’ (the object behaves like a single character) and, if the object is floating, ‘Relative’ (the Left and Top fields determine the offset from the regular floating position). Only the Top offset affects the display within the editor. DOCX import supports these offsets.
Recommendation: for best results across all devices, specify each image’s Width as a percentage of the display, and leave other size values unspecified.
The Margins page shows fields for margins (the space outside any border) and padding (the space between any border and the object).
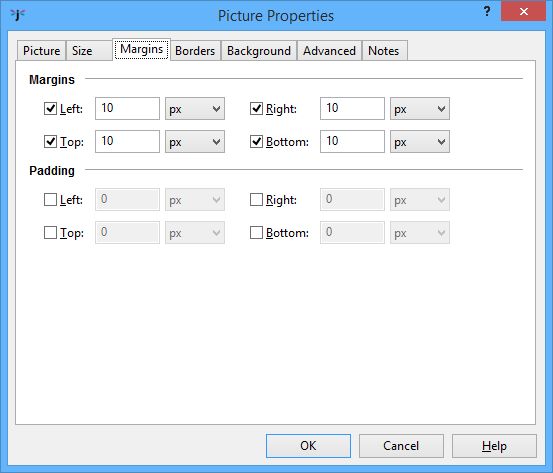
Editing picture margins
To visualise the difference between margins and padding, see Appendix C: The Jutoh Box Model.
In the Borders page, you can specify the border width in pixels, cm or points. The style of the border is restricted to solid, dotted or dashed within the editor, but other selections may show in the ereader.
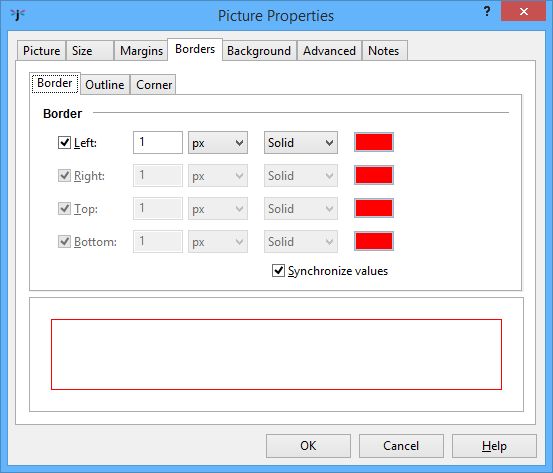
Editing the picture border
You can specify a rounded corner, although this is only supported on some ereaders. You can also specify an extra border called the outline, but this is not recommended as it is not supported in all export formats.
The Background page simply allows specification of the background colour (which will only show for a picture if you also specify some padding).
Finally, the Advanced page lets you enter an identifier, CSS class name, Epub type, JavaScript event handlers and other properties that only more complex books are likely to need. Note that if you specify a CSS class name, image properties such as maximum size and margin will not be included in the generated code as they are assumed to be specified by the class.
You can add captions as normal paragraphs above or below an image. You can manually add the caption and apply a suitable paragraph style, or, if you wish to automatically number your images, you can use the command Format | Insert | Caption. This lets you enter the caption text and choose what kind of object you are captioning (such as a picture or table). Jutoh will then insert the caption text and a ‘sequence’ field that automatically increments the caption number. Finally, Jutoh will apply a suitable paragraph style.
You may find that page breaks appear between the image and the caption, which is not ideal. For Kindle books, it seems that nothing can be done about it for now, but for most other ereaders, you can get Jutoh to glue them together using a non-breaking ‘div’ tag.
To do this, apply a named style to your captions, using different style names depending on whether the caption is above or below the image. Now show the Project Properties dialog and click on Accessibility. Check Add figure and caption tags, and type style patterns for captions below images and captions above images. You can leave one of them blank if all your captions are in the same position. Ensure Avoid page breaks within figures is checked.
If you need to add a caption to a floating image, or the caption needs to be restricted to the exact width of the image, or you have multiple images per caption, create a text box with a percentage or absolute width. Add the image, setting the width to 100%, and then add the caption.
Note that these tips also apply to table captioning.
A problem that many people find with images in Apple Books Epub files is that Apple Books ignores width and height specifications in images, and fits images to the page instead. This can be bad because you may wish to include high-resolution images which will look good on high-resolution devices such as retina-display iPads, while keeping the image to a particular size. The workaround for this is to use a parent ‘div’ tag that takes the image’s size, and have the image expand to the size of the parent. This optimization is applied when Optimize for iBooks is checked in your configuration. An image that is on its own in a paragraph (without any other content), and has its size dimensions specified in its properties, is generated using a ‘div’ tag that takes the dimensions of the image, and dimensions are removed from the image itself.
So, to support a variety of device resolutions, it’s a good idea to specify high-resolution images and specify the desired size (just one of the dimensions will do). Currently this won’t work if you have multiple images or other content in a paragraph.
The SVG format is used for scalable vector graphics, and in some cases can provide better quality than bitmaps. Not all ebook software and hardware support SVG but it’s an increasingly popular format. There are three ways of getting SVG pictures into your ebooks:
Add a media document to your project, containing an SVG image. Insert a reference to the media object with Format | Insert | Media Object. Choose the image you previously added as a media document. A placeholder icon is added, and you can click on it to change the properties. Or:
Add a media document to your project, containing an SVG image. Insert a regular image (PNG, JPEG) that duplicates the look of the SVG image. In the image properties, type the name of the SVG image in the field SVG alternative, such as media/mypicture.svg. Now check the configuration property Use SVG images to write SVG images instead of bitmaps. You may need to specify the image width and height in image properties for the SVG to be displayed correctly. Or:
For more flexibility, add a drawing object which maintains up to three formats: bitmap, SVG and MathML. You can paste drawing objects from other applications that support SVG or MathML, and they are created on import if SVG or MathML is present in the original file. For more details, see the topic Working with drawing objects in the Jutoh application help.
This is what the drawing object properties dialog looks like, with tabs for editing each of the supported formats, and controls for operations such as import, export, previewing and editing:
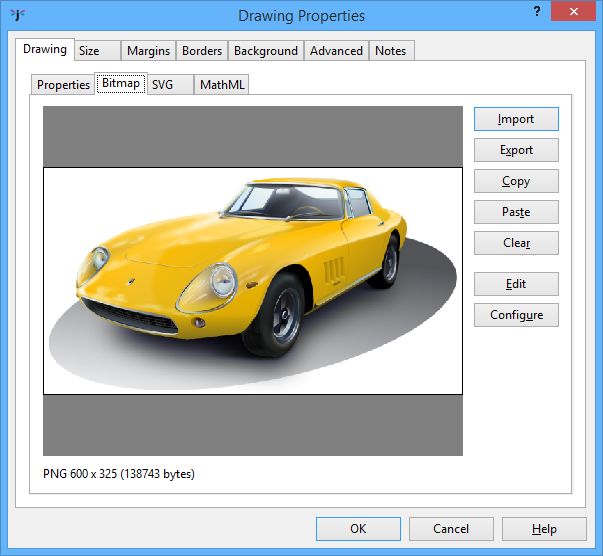
The drawing object properties dialog
With the second and third options, you can use configurations to control whether SVG or bitmap images are exported, so this allows you to maintain different configurations for creating ebooks with either SVGs or bitmap images for different sites or devices.
If you install a suitable SVG conversion tool, such as ImageMagick or Inkscape, and configure their locations in Preferences/Helpers, you can get Jutoh to convert from SVG to PNG. There are three ways Jutoh can help you with this conversion:
Click on the Make PNG button on the SVG tab of the drawing object properties dialog. This overwrites the image in the Bitmap tab with a new PNG image.
Use the Book | Update command to update all the bitmap images in drawing objects that contain SVG images.
Set the configuration option SVG conversion to Always or If bitmap absent, so conversion happens for the compiled ebook file only. This will not affect any images in the project itself. So if you wish, you can keep the project file size down by only specifying SVG images, and have Jutoh generate bitmaps dynamically on compilation.
You can control some aspects of picture import when they are part of documents imported via the New Project wizard. In the Import Preferences pane in the Preferences dialog, or in the Import Options page in the New Project Wizard, you can choose whether to import images or not, and whether to resize them and to what size.
If you want to specify the image size later, you can clear the Respect specified image size option. This will force images to be imported either at the width you specify, or at the maximum resolution they have in the original file. Then you can specify the maximum image width and height in your configurations for later resizing (see Image export to ebooks below).
Some types of picture cannot be imported from ODT documents (in particular SVM, the StarView Metafile format). These pictures should be pasted or inserted by hand after import. Or, export an HTML file using OpenOffice or LibreOffice, to the same folder that contains the ODT and with the same root name as the original file. For example, thing.odt should be exported as thing.html. GIF files will be written to the folder, and Jutoh will use these images when importing from ODT.
Pictures pasted from the clipboard into a DOCX file are stored as Windows Metafiles. These can be imported by Jutoh on Windows, although picture size may be slightly different from the original. On Linux and Mac OS X, metafiles are ignored, so you have several options:
perform the document import on a Windows machine and copy the .jutoh file afterwards to your Linux or Mac machine;
in your original DOCX file, replace pasted images with images inserted from PNG or JPEG files and then perform the import; or
paste or insert the missing images into your Jutoh project.
In addition to per-image settings, you can control aspects of how Jutoh will write all images to your ebooks via configuration options, described here.
By default, Jutoh will convert non-JPEG images to the more space-efficient JPEG format. You can switch this off via the Convert images to JPEG configuration setting. You can also choose the compression ratio when converting, using the Image quality configuration property – the higher the value, the better the quality. 80% is usually a good value.
You can also control the maximum image width and height, using the Maximum image width and Maximum image height properties. If one or both values are specified, Jutoh will physically resize and rewrite each image on export if one or both of its dimensions exceed the specified maximum. In this way, you can easily create multiple books with images optimized for different screen sizes or file size requirements.
An additional option – Maximum image optimization width – applies an optimization for images whose width is the same or smaller, by simply doubling the size before rescaling back down. This improves image quality at the expense of longer compile times, so you might like to have a configuration with this set to -1 for ‘preview compiles’ if you have a lot of images.
The above options determine the maximum image size at the time the image is written to the ebook. However, often you will not know in advance what size is best for the device that is being used. Kindle viewers will automatically scale images to fit, but for Epubs, you might like to check Limit images to viewer size (on by default) – this generates CSS that limits the image size to the maximum width or height of the current viewer. This will only work if you have one image on a line, since two images side-by-side will get a combined 200% of the viewer width or height. You can override the maximum width and height on a per-image basis by specifying these values in the image properties dialog. If your image is too big for the device display, it could break across two pages – this can cause the Epub to be rejected by iTunes, so make sure Limit images to viewer size is checked if your book contains large images.
If you have specified absolute sizes for images in centimetres – quite likely after importing from a word processor file – you may find the images are too large for small ereader displays, or they are not in the proportion originally intended relative to the display width. It can be better to use percentages, and you can apply this to all images (and boxes and table objects too) when exporting ebooks by checking the Replace absolute widths configuration option. Jutoh will use the paper size and left and right margins defined in the configuration (or the parent object’s width, if it’s an absolute value) to calculate a percentage width for a given object width.
If your PNG images contain alpha transparency, by default Jutoh will ‘flatten’ them, that is, remove the transparency and give the images a white background. You can suppress this by setting the Flatten images configuration option to (none). Alternatively you can specify a background colour with this option, or specify that the background colour should be taken from the parent box or table’s colour, if any, or white otherwise. If you do not flatten images, they may end up as black boxes in your ebook. Note that GIF images cannot be flattened, unless converting to JPEG.
If you find your images look a little blurry (particularly if you’re using images for symbols or equations), switch conversion to JPEG off in your configuration(s), or use GIFs and set Convert images to JPEG to ‘All except GIF’. Or, you can leave JPEG conversion on, but for selected images such as symbols and diagrams, check the Preserve original format option in each image’s properties.
As mentioned above, if you have multiple instances of the same image in your project, you can indicate to Jutoh which images should only be exported once by choosing a unique name for the Name field in the image properties dialog; the first image with a given name will be exported, and subsequent occurrences will use the same image. The name will also be used as the root of the image file name. Don’t use non-ASCII characters, such as Chinese characters, for file names or EpubCheck and/or Kindlegen will fail.
If you need to extract all images from your book, in their original format and size, you can use the File | Export | Images command. It will prompt you for a folder that will contain the files. If you need to get hold of the files that have been converted to JPEGs and resized as part of the book compilation process, then you can unzip the Epub file using an archive tool, renaming the extension to zip first if necessary.
If your project contains a lot of large images that slow Jutoh down and cause extreme computer resource usage, you can switch images off temporarily, or you can tell Jutoh to load images on demand. These options are in Project Preferences/Advanced and are Enable images and Load images on demand. You need to change these options before you load the relevant project.
Instead of inserting images directly, you can insert media documents and then add media objects that refer to them. For more on this, see Embedding media.
We’ve seen how to insert pictures and adjust the way they are saved in your compiled ebooks. Next, we look at further refinements for your books, namely getting Jutoh to help create various kinds of index section.
Contents | Start | End | Previous: Chapter 9: Understanding Configurations | Next: Chapter 11: Working With Indexes