
Contents | Start | End | Previous: Chapter 10: Working With Pictures | Next: Chapter 12: Working With Style Sheets
Jutoh can help you with four kinds of index – table of contents, alphabetical index, endnotes (or footnotes at the end of each section), and bibliography. For a simple book, you don’t have to know how to use these, and Jutoh will generate a simple table of contents automatically by default.
In an Epub 2 book, there is always a NavMap (navigation map, or logical table of contents) which tells your ebook reader to list the sections in your document. Optionally, you can create a page listing the contents of the book – more like the contents you’ll see in a book. It’s just a regular page with hyperlinks to your book sections. In Jutoh we’ll call these ‘NavMap’ and ‘table of contents’ respectively. The following screenshot of Adobe Digital Editions illustrates the difference between a NavMap (on the left) and a table of contents (on the right):
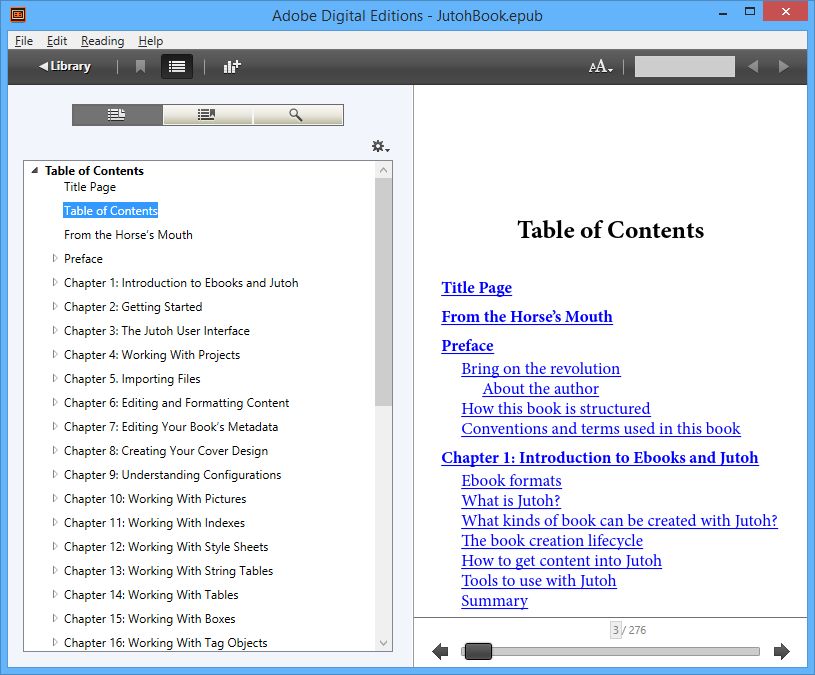
Adobe Digital Editions showing a NavMap and table of contents
Ebook readers will present the NavMap in different ways, and some may label it the ‘table of contents’. The main point is that in an Epub you have to have a NavMap, but a separate table of contents page is optional.
Mobipocket files also have a logical table of contents (NavMap). On Kindle for PC and Mac, you can show the NavMap using View | Show Table of Contents, and on Kindle Previewer 3 this is shown on the left-hand panel, as below:

Kindle Previewer showing the logical contents (NavMap)
On Kindle devices and apps, the NavMap may be shown in a sidebar or when clicking Go to.
When creating an Epub file, Jutoh always creates a NavMap (by default, from the titles of your book sections). Jutoh can also create a basic table of contents page simply by checking the Generate table of contents property in the current configuration (Project Properties/Configurations). The extra page will appear in your book, but will not be visible in your Jutoh project.
Jutoh supports an additional, advanced method of building a NavMap and table of contents. In this mode, you maintain an explicit list of contents entries, with help from Jutoh. The entries appear in the Contents page of the Project Properties dialog (under Indexes/Contents), and are also editable in the Table of Contents Wizard. Use this wizard (with the command Book | Build Table of Contents) to switch to advanced mode and specify how contents entries will be gathered from headings in your documents.
Why would you want to use this advanced method instead of the default table of contents generated by Jutoh? Well, you get more control of styling and of which entries will appear in the contents, and you can generate a table of contents that’s several levels deep (the default method only gives you one level). So for most projects it’s worth the extra effort.
Here’s how the contents entries appear in Project Properties, after running the Table of Contents Wizard at least once:
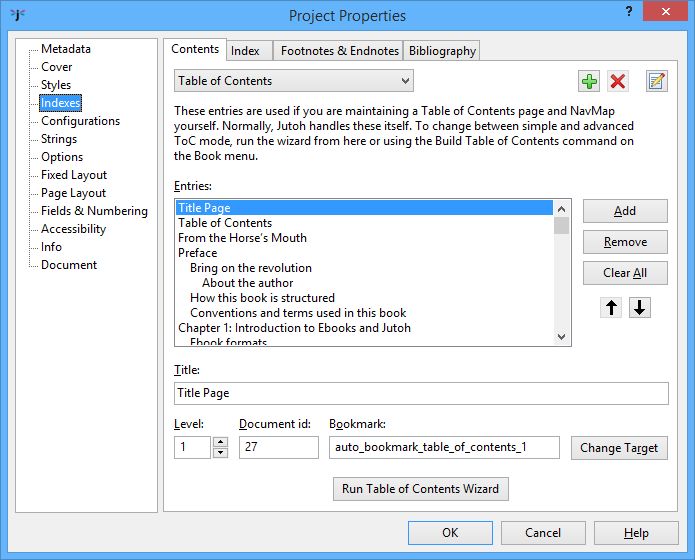
The Table of Contents page of the Project Properties dialog
Let’s have a look at the Table of Contents Wizard, invoked by pressing Run Table of Contents Wizard in the Project Properties dialog or from Book | Build Table of Contents. Here’s the first page:
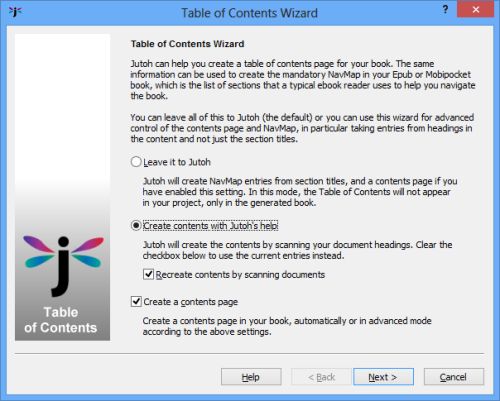
Table of Contents Wizard: first page
To create an advanced table of contents with both a NavMap and a separate table of contents page, check Create contents with Jutoh’s help, and also Recreate contents by scanning documents, and Create a contents page. In the next wizard page, we specify the settings that Jutoh will used when finding headings in the document.
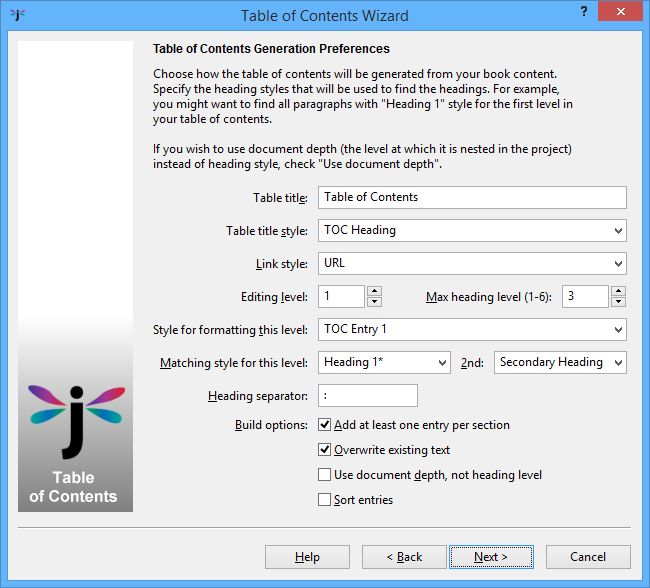
Table of Contents Wizard: generation preferences page
Let’s explain the options presented here.
Table title specifies the text of the title that will be inserted in the table of contents.
Table title style lets you choose the paragraph style that will be used to format the table of contents title.
Link style specifies the character style that will be used to format the linked entries in the table.
Max heading level lets you choose the maximum number of levels that will appear in the NavMap and table of contents.
If you check Overwrite existing text (the default), the whole table of contents page will be replaced when regenerating it. Usually this is what you want, but you might want to clear this option if you have entered extra text that you want to keep and you want to manually edit out the old entries later.
Add at least one entry per section determines whether Jutoh will add an entry for a section even if it didn’t match any headings. Usually it’s best to keep this option checked.
Use document depth, not level can be checked if you want to bypass matching headings, and instead generate one link per section and use the hierarchy of your project to determine how the NavMap and table of contents is built. You can create or move book section documents under other ones to create a hierarchy; if you are not using Use document depth, an actual hierarchy isn’t necessary since headings give an implicit hierarchy, but it’s an option that you have.
Editing level shows the current level we’re editing, affecting the next two fields. There will be as many levels available here as we specified in Max heading level.
Style for formatting this level is the paragraph style that will be applied to the entry at this level (depth) of the contents page.
Matching heading style for this level tells Jutoh that when this style matches within the project, we will treat this paragraph as a heading at this level. You can match against multiple styles by specifying asterisk (‘*’) for ‘match multiple letters’, and you can specify multiple patterns by separating them with the pipe character (‘|’).
2nd is a pattern for matching an optional secondary heading, for when the chapter title is split across two lines, for example ‘Chapter 1’ and ‘The Beginning’. The secondary heading will be appended to the primary heading using the text specified in Heading separator.
In the example, we’re allowing Jutoh to look at three headings levels, and for the first level, we’re going to search for the ‘Heading 1’ style and format each table of contents entry with ‘TOC Entry 1’. Click on the Editing level control to change the level number and specify the heading styles that will be used for the other two levels.
When you click on Next, Jutoh will build the table of contents and show the results in the next page, for you to edit or accept as-is:
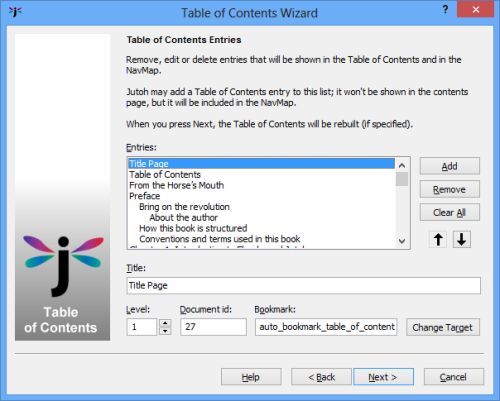
Table of Contents Wizard: entries page
If you find that Jutoh hasn’t found the headings you thought it would, click Back, edit the options, and try again. You might need cancel the wizard and apply styles to your content, for example if you don’t have consistent heading styles. You also need to make sure that Jutoh will find headings without skipping levels; Jutoh will complain if there are such jumps. For example, going from level 1 to level 3 is not allowed, although you don’t have to ‘unwind’ the headings similarly; you can happily jump from level 3 back to level 1. It probably indicates a problem with your document if you have, say, a ‘Heading 1’ followed by a ‘Heading 3’. While this may achieve the look you want, you also need to think about a proper structure for your document.
When you click Next, the final page will be shown with an option to automatically build the table of contents whenever generating the Epub or Mobipocket – you can leave it unchecked if you can remember to use Update whenever a heading has changed in your project.
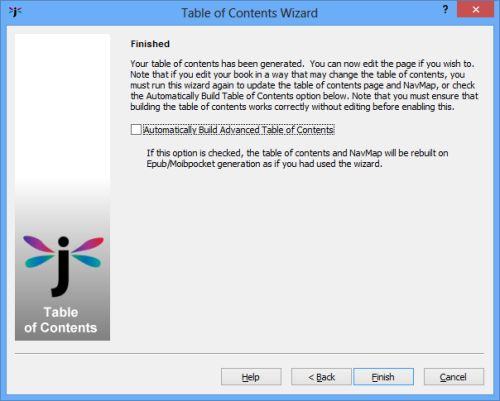
Table of Contents Wizard: final page
Click on Finish to quit the table of contents wizard.
Note that to make best use of the advanced table of contents facility, you need to use consistent heading styles in your document, so Jutoh can work out the heading levels (in the structure implicit in your document) and add bookmarks to them. For example, you might use ‘Heading 1’, ‘Heading 2’, ‘Heading 3’ and so on.
If you haven’t opted to add a table of contents page, Jutoh will still use the found entries to create the NavMap. To revert to ‘simple mode’ again, run the wizard and the entries will be deleted, telling Jutoh to generate a basic contents page (if specified).
If an explicit table of contents page is found in the project (by searching for the title ‘Table of Contents’ or by finding a document whose Guide Type is set to ‘toc’ in its document properties) then Jutoh will suppress the basic contents page to avoid duplication.
Note that if you are using basic contents creation, the entries are formatted with ‘TOC Entry 1’ (if available) and the contents heading is formatted in ‘TOC Heading’ (if available).
To edit the detailed properties of your table of contents when you’re not using the table of contents wizard, show the Project Properties dialog, click on Indexes, then click on Contents. Now click on Edit  on the top row of buttons and you will see the Table of Contents Properties dialog:
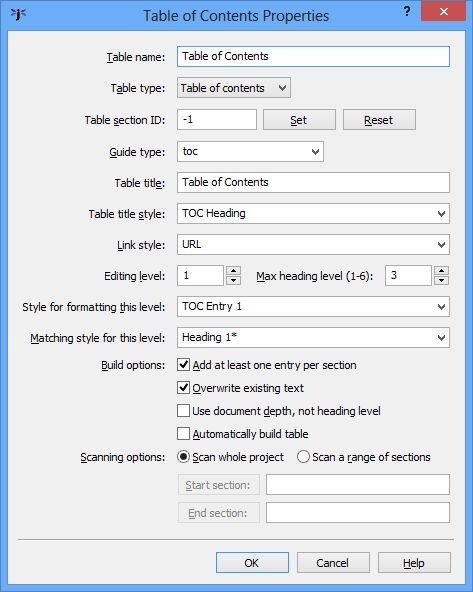
The Table of Contents Properties dialog
Most of the settings are as per the table of contents wizard, but some give additional control for multiple tables (see Adding multiple tables below).
Jutoh allows you to add further tables, for example tables of figures, or the contents for a part of the overall book.
Click on Add  at the top of the Contents tab, and give a unique identifier for this table. You can change the title used for the table page, and setting the Table type field indicates to Jutoh that you would like a table of contents, an index of illustrations, an index of tables, or a custom index. Jutoh will change some of the fields to more appropriate defaults when you change the table type, but they all work the same way: by scanning paragraph styles for items to include in the table. For an index of illustrations, for example, you can get Jutoh to match against caption styles, say with the matching style value “Picture Caption*”.
Set a range to scan if you’re interested in a particular set of pages. If you already have a section that you want to use for the new table, you can click Set next to Table section ID to specify the document to use.
Switch between tables with the drop-down list at the top of the Contents tab. When you click on Run Table of Contents Wizard, it will use the currently selected table. If you haven’t specified a document to use for the table, one will be created, which you can move to the desired place in the project later.
To edit properties of your table, such as the title, the range of pages, and styles, click on Edit  .
.
In most formats, tables are output as they appear in the Jutoh project. For OpenDocument (ODT) output, however, Jutoh tries to output a special index that gathers items from the document dynamically. This means that if you edit the ODT document, updating the document fields ensures your indexes are updated as intended. It also means that you get proper page numbers in the indexes in your ODT or exported PDF document, and not just links.
Jutoh will look for the guide types “toc” (table of contents), “loi” (list of illustrations) and “lot” (list of tables). If it finds one of these, it generates a table-of-contents field that refers to the relevant table, and ignores the actual text in that document. The table-of-contents field in turn generates the appropriate code in the ODT file. You won’t see this field, since it’s generated as an intermediate step. If you are creating a custom index, and therefore don’t set a guide type, the value of Table section ID will be used to indicate that the document is a special index.
You can suppress this special index generation by clearing the Special table of contents formatting configuration option.
Links from the contents page will be formatted using the character style specified by Link style in the Table of Contents Wizard Preferences page. By default, this is the style called ‘URL’, that Jutoh adds to your style sheet by default. This makes the links look good in Jutoh, but if your book reader uses different colours for links by default, you may have a colour clash. So, you can have Jutoh strip out the URL styling when generating the ebooks by specifying the value of URL attribute removal style in your configuration. It’ll only strip out attributes that are the same in the style to you specify in the configuration, and the actual link, which means you can have specific colours and other attributes in your content without them also being removed. The same logic applies to indexes and footnotes.
If Jutoh’s automatic contents-building facility isn’t for you, you can construct the NavMap and table of contents page manually. Build your NavMap in Project Preferences under Indexes/Contents, by creating individual entries and linking them to bookmarks (or overall sections). Now you have a choice of how to create the table of contents page. You can run the Table of Contents Wizard, clearing Recreate contents by scanning documents so it only regenerates the contents page without scanning headings and recreating the NavMap. Or, you can create the table of contents page entirely by hand by adding a section, giving it a Guide Type of ‘toc’ (see the document properties, available from the project outline context menu, or Document | Document Properties) and adding links. This is laborious, so it’s likely that you’ll want to use one of the automatic or semi-automatic methods.
Automated table of contents creation doesn’t currently work for fixed layout, since you may choose to have your contents within an arbitrary text box. Instead, create your table of contents manually by linking to pages and (optionally) bookmarks within the pages.
You can, however, edit the NavMap entries in Project Properties/Indexes/Contents, and if there is one or more, Jutoh will use this to generate the NavMap in the book instead of adding all section titles.
Epub 3 uses a different kind of NavMap: a navigation document. It’s common to generate the NCX as well, for older ereaders, and this is the Jutoh default, but if you wish to suppress NCX generate, clear the configuration option Generate NCX. Both kinds of navigation index are created from the entries in Project Properties/Indexes/Contents.
Jutoh can create an alphabetical index if you insert index entries throughout your book. The items in the index are linked to the appropriate position in the book.
Insert index entries by selecting some text for the entry and using the Format | Insert | Links | Index Entry menu command. Or, you can leave the text unselected and type the entry in the Index Entry dialog.

Index Entry dialog
When you press OK, the index entry will be inserted and shown as this symbol:

To edit the entry, simply click on the symbol.
You can create a multi-level index by filling in the Key 1 and Key 2 fields. These represent a category and a sub-category, and will be written with suitable indentation in the index section. For example, if you fill in the Entry, Key 1 and Key 2 fields with ‘Cat’, ‘Animal’ and ‘Mammal’ respectively, you would get Animal, Mammal, Cat in the index. The Entry field is always the final (most specific) item.
The index section is not created until you instruct Jutoh to do so, via the Index Properties page, or the Book | Update command.
In the following screen shot, two index entries have been added: Cat and Dog, each with Animal and Mammal keys. The items are linked back to their original position in the document; if there are multiple locations for the same index entry, linked numbers are shown instead following each entry.
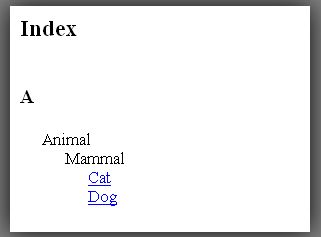
Two index entries
If you need to add a ‘see’ or ‘see also’ entry, you can choose one of these options from the Type dropdown control, and then type text into the See entry. It will be placed by the relevant entry in the index, according to the entry and key fields. This kind of index entry doesn’t have to live anywhere in particular but is easy to lose, so consider inserting all ‘see’ and ‘see also’ entries into the same page.
You can edit various aspects of index presentation in the Index Properties page. Click on Edit on the toolbar or Book | Project Properties, or type Alt+Enter, then click on Indexes, then Index, and finally on the Options tab.

Index options
Settings include the title of the section and how items are to be formatted. Using the Link format field, you can choose whether items will be bracketed. You can customise separators between the entry text and the link, and between links. With the Only use linked numbers option, you can determine whether an item with a single link will have clickable entry text (off), or a more consistent look using a single linked number (on).
You can specify that the index should be recreated every time the book is compiled (check Automatically build index) so you don’t have to remember to rebuild the index after editing.
You can edit the index itself in the Entries tab: you can change the text of items, remove them, and reorder them. These edits will only be retained if you answer No after clicking the Generate Index Now button. If you update the index from the Update Special Book Sections dialog, the index will be rebuilt from scratch from the entries in the book content, losing any edits in the Entries tab.
Index entries are imported from ODT and DOCX documents. However, no special formatting (such as italics) can be applied to parts of entries or keys – they are simple text strings all formatted with the same style.
A Jutoh book can have either footnotes at the end of each chapter (the default), or a separate endnotes section. Footnotes are always automatically created when the book is compiled, but the endnotes section must be explicitly updated or told to update itself automatically before each compilation.
You can insert footnotes or endnotes using the Format | Insert | Links | Footnote menu command. Type the note text in the editor dialog, press OK, and this note symbol will appear in the text:

To edit the note, just click on the symbol. You may wish to resize the editor to see more items on the toolbar. Since you cannot use menubar commands from the footnote editor dialog, you can instead use the context (popup) menu to format text – this is shown with right-click on Windows and Linux, or control-click on Mac.
Note that currently, Jutoh applies the ‘Footnote’ style to all footnotes when appended to a section or collated in the Endnotes section, unless Always apply style is cleared in index properties.
You can configure the way footnotes and endnotes are presented via the Footnotes and Endnotes page in Project Properties. Click on Edit on the toolbar or Book | Project Properties, or type Alt+Enter, then click on Indexes and finally on Footnotes and Endnotes.
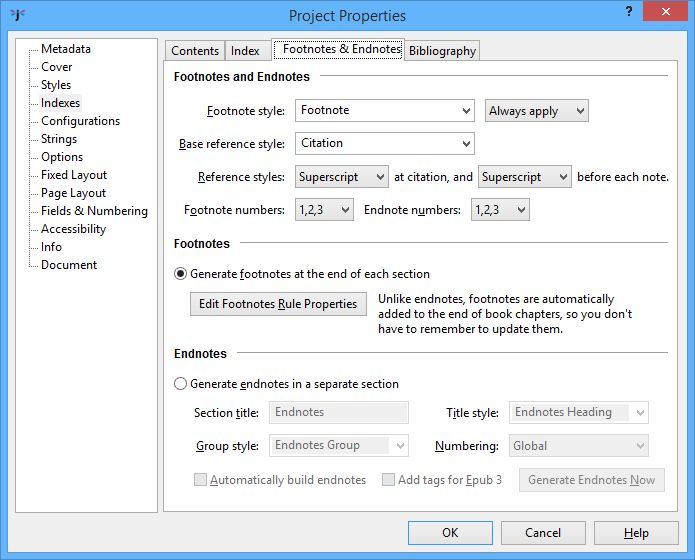
Footnote and endnotes options
In the footnotes and endnotes properties page, you can choose whether the citations will be represented by superscript numbers or numbers in square brackets.
You can influence how the citation numbers are styled by changing the Base reference style (by default, ‘Citation’), or editing the ‘Citation’ style definition in the style sheet editor. By default, the ‘Citation’ style applies no extra formatting.
In footnotes mode (the default), your footnotes will not show within Jutoh (unless edited), but if there are any footnotes in a chapter, they will be appended to the chapter when the book is compiled, after a horizontal rule (divider). Footnotes are always added, so if you were to import footnotes from an ODT file and then compile it without altering any settings, they will show up.
For Epub books, you can change the horizontal rule properties from the footnotes and endnotes properties page. For example, you can set it to be coloured red and occupy 30% of the page width. For ODT files, Jutoh will insert an image reflecting some of the configured properties.
If you switch to endnotes mode, you need to use the Book | Update menu command to create the endnotes, or create the section from the Footnotes and Endnotes properties page. From this page, you can choose to always rebuild the endnotes page by checking Automatically build endnotes.
In the properties page, you can choose the endnotes title and styles for the title, per-chapter heading, and whether the numbering will be global (continuous numbering) or whether it should restart for each chapter. Note that a chapter should be a separate section, or numbering won’t start for each chapter.
Normally, whether the numbering is global or starts again for each chapter, the chapter headings will be shown. You can suppress chapter headings by leaving the Group style blank.
Footnotes are imported from ODT files, but not from HTML files since there is no representation for footnotes in HTML and it’s impossible to distinguish them from regular linked text. So if importing from HTML, you will need to copy the footnote text into new Jutoh footnotes. There is an option in the Jutoh Document Cleanup dialog (from the Book menu) for recognising InDesign footnotes and converting them to Jutoh, so if you are importing from InDesign HTML, it’s worth trying this.
Jutoh has tools to manage bibliographic entries and create a bibliography or references section from them.
If you import a document from a DOCX or ODT file and it contains embedded citations, Jutoh will import them as special citation objects. You can then click on these objects and edit the individual fields.
By default, if you import a document with a bibliography, Jutoh will use the imported citation and bibliography text without any special processing. The imported citation text, such as ‘Smart, 2005’, will be imported into the Custom citation field for each citation object, and will be output as-is. The bibliography section will also be imported and compiled as-is. This allows you to reproduce as exactly as possible the imported document. Alternatively, you can use Jutoh’s facilities to format citations and also replace the bibliography section. Let’s look at this in more detail.
You can create a new citation by using the command Format | Insert | Links | Citation, or by double-clicking on the bibliographical reference object in the Objects palette. You will then see the Insert Citation dialog:
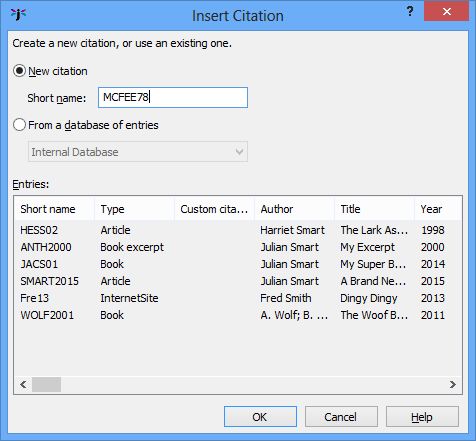
The Insert Citation dialog
You can choose to create a brand new entry for the citation, or browse the existing databases and items already in the project, if any.
When you press OK, you will be shown a property editor, as below, with the opportunity to see either only the important properties (fields) or all of the relevant ones for the selected item type.
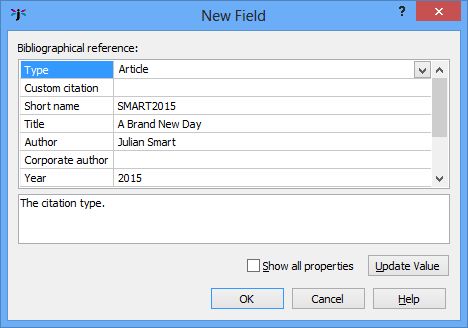
The bibliographic reference editor
Press OK to insert the citation after you are satisfied with the field values.
When entering person names into a field, separate them using semicolons and type the forenames first. For example: “Dr Julian Smart; Fred Bloggs”. You will be able to change the way that names are written to the bibliography or shown in a citation, but the names should be entered in this standard format.
Entries are stored in two places: in one or more databases that you can edit via the Project Properties/Indexes/Bibliography panel, and in the content itself. By storing entries at the point of citation in each document, information doesn’t get lost when copying and pasting between projects. When a citation is edited, or the bibliography updated in Jutoh, the data in the citations and in the database(s) are synchronised. You can edit the entries either by clicking on citations in the content, or by editing the databases via the bibliography settings. You can cite the same item multiple times, since each item has a unique ‘Short name’ that ensures the same information is used.
As we shall see in more detail, you can create as many bibliographic databases as you like in Jutoh, and have Jutoh take items from these databases. The first database (called ‘Internal Database’) is special in that it represents the desired items for the bibliography, taken from citations or from other databases. Databases are always stored in an individual project, not globally, but they can be exported and imported into other projects. This ensures that a project can be shared without losing the information that is required to edit, update and compile it.
To create a bibliography section, use the menu command Book | Update and check Bibliography; or you can click on Generate Bibliography Now from Project Properties/Indexes/Bibliography. This scans through all the citations in your project, optionally sorts them, and formats them into a Bibliography section which Jutoh will create if there is not one already (with the ‘bibliography’ guide type). If there is an existing bibliography section, imported from a file, you may wish to delete it first assuming you’re happy for Jutoh to handle the formatting.
If you add, delete or edit an item, or change the bibliography settings, you will need to update the bibliography again as above, before compiling the book.
There are many ways in which you can change how Jutoh formats the bibliography. Go to Project Properties/Indexes and click on the Bibliography tab. The Options sub-tab is the first to be shown:
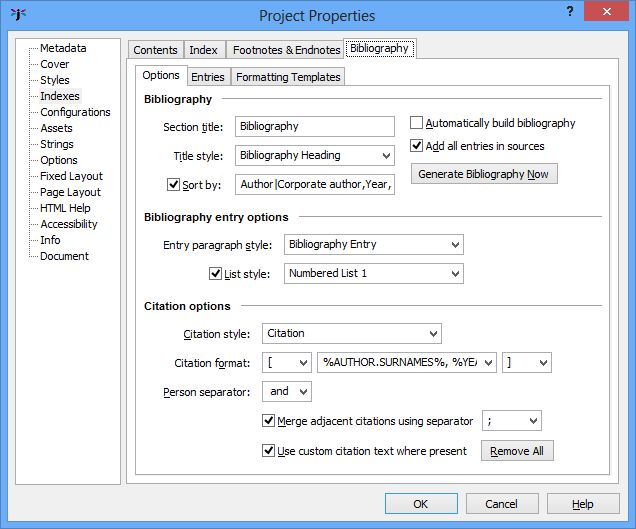
The Bibliography Options panel
Here you can change the bibliography section title and its style. You can specify whether the items are sorted and if so, using which fields.
You can specify that all items should be output, and not just the cited ones – Jutoh will use any databases specified as sources in the Entries tab.
You can specify the paragraph style applied to each entry in the bibliography, and also whether entries should be formatted as a list.
The citation options are pertinent to the display of citation items as referenced throughout the content, rather than formatting for the bibliography section. You can specify the citation character style. By default, the ‘Citation’ style doesn’t apply any formatting, but you can edit the style to have your own formatting such as superscript, or you can specify a different style.
For the citation format text, specify text containing field keywords such as %SHORT NAME%, %YEAR% and the special keyword %NUMBER% for the position in the bibliography. You can also add an optional prefix and suffix for the citation, for example brackets. If the citation shows authors, specify a separator to use for multiple authors.
When specifying author fields in the formatting description, you can append an operation to the name in order to change the way the names are formatted, for example %AUTHOR.SURNAMES%. Here are the keywords you can use:
SURNAME: the surname of the first person.
SURNAMES: the surnames of all people, separated by the value of the person separator field.
FORENAMES: the forenames of the first person.
SURNAMEFIRST: the full name of the first person, surname first.
SURNAMELAST: the full name of the first person, surname last.
SURNAMESFIRST: the full names of all people, surname first.
SURNAMESLAST: the full names of all people, surname last.
If you have imported citations from a file and want to use the citation text already present, you can check Use custom citation text where present. If this is cleared, Jutoh will only use its own formatting as specified here. Or you may wish to remove all the imported citation text using Remove All so that you can use Jutoh’s citation formatting most of the time but occasionally override it via the ‘Custom citation’ property.
A handy option is Merge adjacent citations, which if checked tells Jutoh to merge citations instead of showing them separately. So this way you can have [Smart, 2011; Bloggs, 2012] instead of [Smart, 2011][Bloggs, 2012] if citations are next to each other. You will only see this in the compiled book, and not in the editor.
As mentioned above, Jutoh always maintains an ‘Internal Database’ of items collated from the project’s citations and other databases to put into the bibliography. You can create further databases from which citations can be selected or which can be added in their entirety to the bibliography. To manage these, go to the Entries tab of the Bibliography page.
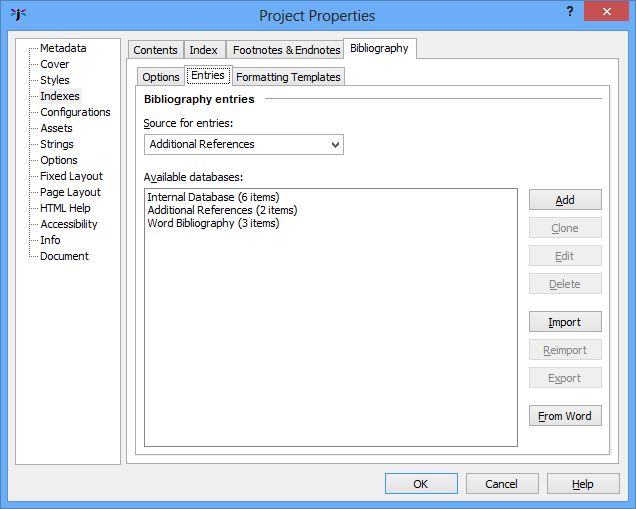
The list of bibliographic databases
Here you can edit, add and delete databases (though you can’t delete the Internal Database). You can export to and import from databases using files with extension ‘jutohbib’, a binary format. On Windows, you can import from the global Word bibliography file using From Word, if you have Microsoft Word and there are entries gathered from documents.
If you wish, you can select a database in the Source for entries control for an additional database to be used for collecting items. You can select several by typing the names separated by commas.
Click Edit to edit, add or delete entries, or modify the template that specifies the valid fields and types for the database.
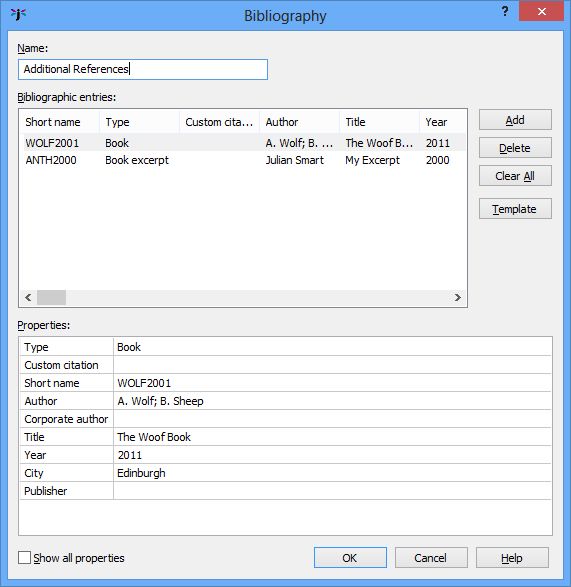
The bibliographic database editor
If you click on Template, you can edit the fields and item types:
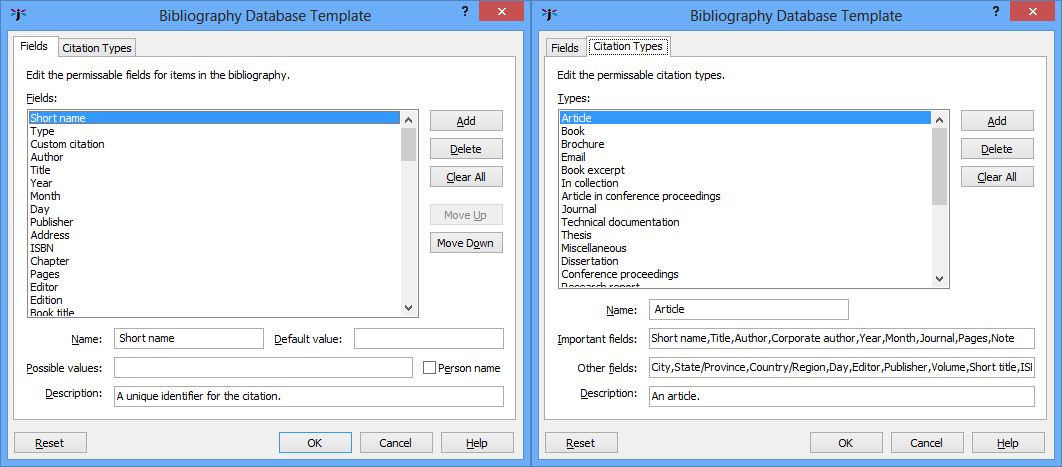
The bibliographic database template editor
If you make edits to the template that you regret, you can click Reset to return the template to the Jutoh defaults, which give a reasonable coverage based on fields used by Word, LibreOffice and BibTeX.
There are many standards and preferences for formatting a bibliography, and Jutoh cannot hope to build in all possibilities, or make a point-and-click GUI for it that is flexible enough. So Jutoh uses a little language dedicated entirely to this purpose, so that any user can tailor the bibliography formatting to his or her taste, even if the fields in the database template have been changed.
To look at this, click on the Formatting Templates tab:
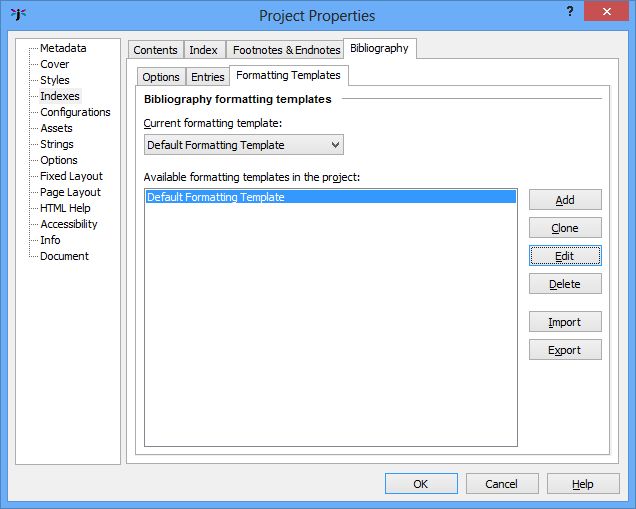
The Formatting Templates tab
There can be many formatting templates in the project, but only one is active at a time, as specified by Current formatting template.
Selecting a formatting template and clicking Edit shows a dialog with two tabs, for editing and testing:
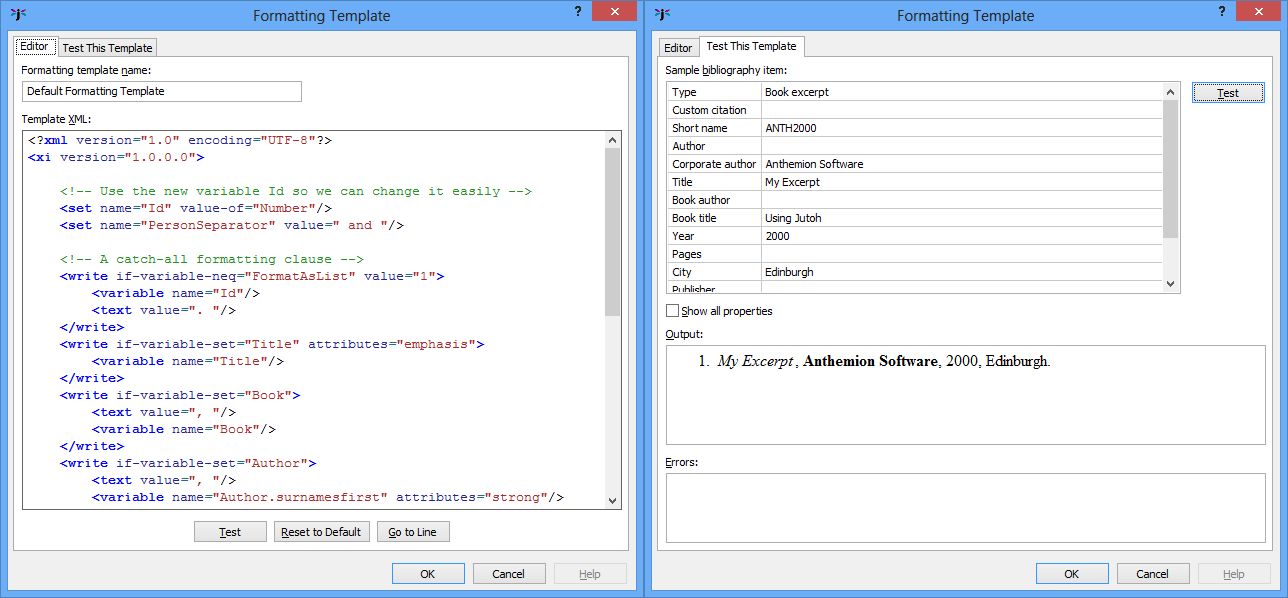
The bibliographic formatting template editor
We have chosen to express the language in a simple XML format. Don’t be intimidated by this: it’s really very simple and there’s not much to learn. Plus most of the time you will be making small changes to the existing specification, if you even need to make changes at all. To make your life more pleasant, there’s a little test facility where you can immediately see the results of your changes and check for errors. We think this compares favourably with the way other applications handle this aspect – there’s a balance between simplicity and expressiveness, and it’s easy to share formatting templates with other users.
To learn more about the formatting language, please see Appendix D: The Bibliographic Formatting Language.
When you export a document containing citations to an ODT file, and the configuration option Special bibliography formatting is checked, Jutoh will write the full citation information for later editing in OpenOffice or LibreOffice. It will also replace the Jutoh-generated bibliography section with an ODT bibliography field. If the option is cleared, Jutoh will generate the citation text and bibliography section without any special ODT fields. This allows you to use Jutoh bibliography formatting and more complex citations, but if you intend to edit citations within OpenOffice or LibreOffice, and change the bibliography style in these applications, then you might want to check the option.
Note that Jutoh cannot translate the XML formatting template to the ODT bibliography style, which is much less expressive. So if Special bibliography formatting is checked, you may need to customise the bibliography style in the word processor. All in all, if you just need to export to a print format without much further editing, it’s better to keep the option cleared and let Jutoh do the citation and bibliography formatting.
We’ve seen how to build a variety of special index sections in Jutoh. We’ve mentioned styles and style sheets from time to time throughout this guide; now we’ll devote a chapter to them as styles are important in Jutoh.
Contents | Start | End | Previous: Chapter 10: Working With Pictures | Next: Chapter 12: Working With Style Sheets