
Contents | Start | End | Previous: Chapter 14: Working With Tables | Next: Chapter 16: Working With Tag Objects
This chapter shows you how to create and use boxes, and how to manage differences in box layout between platforms.
Text boxes allow you to enclose text and other content within a rectangular area, optionally with a background colour and border. Normally boxes act as a single character within the rest of your document, but you can set the floating mode to be left or right as for images, to allow text to flow to the right or left. This won’t show in the editor, but will be shown in the generated ebook if the ereader supports it.
To understand the way margins, padding and borders work when showing a box, refer to Appendix C: The Jutoh Box Model.
Here’s a selection of boxes from the project Formatting Sample provided with Jutoh:
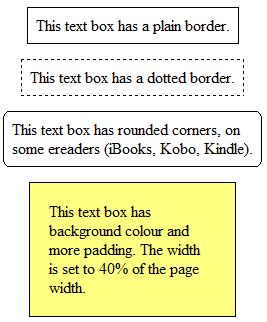
Sample boxes in Jutoh
There are several ways to create boxes interactively:
using the menu command Format | Insert | Text Box;
using the context menu command Insert | Text Box;
double-clicking on a box style in the Formatting Palette with no existing box selected.
If any content is selected before you create the box, it will be moved inside the box.
When you click inside the box, you can edit content as usual, and editing and formatting commands will apply to the contents of the box.
You can edit the box properties with the Box command on the context menu. This shows a formatting dialog with various pages, namely Box, Size, Margins, Borders, Background and Advanced.

The Box Properties dialog showing the Borders page
In the Box page, you can define a style (see below) and also whether the box is treated as an ‘aside’ (outside the main flow of the text) for the purposes of Epub 3.
You can define borders with a small range of styles (solid, dotted and dashed), a width, and colour. You can also define a rounded corner radius, but rounded corners are not supported on many ereaders. For example, Adobe Digital Editions, Nook and Bluefire Reader do not support them. However they are supported on Kindle (KF8), Kobo and Apple Books. If rounded corners are specified, the whole border will have just one style and width: individual differences between sides will be ignored.
To delete a box, click outside the box and delete it as you would a single character. If you want to preserve the contents of the box, you will need to cut and paste it elsewhere before deleting the box.
By default, boxes size to their content (and any padding), but you can set a specific width and/or height using the box properties dialog. Currently, you can’t resize a box interactively.
If you have specified absolute sizes for boxes in centimetres – quite likely after importing from a word processor file – you may find the boxes are too large for small ereader displays, or they are not in the proportion originally intended relative to the display width. It can be better to use percentages, and you can apply this to all tables, boxes and images when exporting ebooks by checking the Replace absolute widths configuration option. Jutoh will use the paper size and left and right margins defined in the configuration (or the parent object’s width, if it’s an absolute value) to calculate a percentage width for a given object width.
Although you can specify vertical alignment for a box in Jutoh, and the content will be shown vertically aligned in Jutoh, currently this won’t be reflected in any exported formats due to restrictions in the expressiveness of those formats. In a future release this limitation may be worked around; meanwhile, if you really need vertical alignment, you could use a one-cell table, or use the option Emulate boxes using tables. Note that if you don’t specify the box height, and specify a padding around the content, you can achieve the look of vertical centre alignment, since the box will be sized symmetrically around the content.
If a box doesn’t appear to have a border in the generated ebook, when it does within Jutoh, try increasing the thickness of the border.
If you set the Floating mode for a box to Right or Left, make sure that the text box will fit on small displays. Otherwise the ereader may choose not to make it float. You could specify a percentage width, such as 50%, to ensure that the box will fit.
Text boxes will be imported from DOCX, ODT and HTML files.
In DOCX import, in addition to import of ‘true’ text boxes, any paragraph that has a border will be interpreted as a text box.
For text box import to work in HTML, the box must have a border.
You can create box styles just as you would create paragraph and other styles, but with a different set of pages for editing box attributes. Box styles can be used with text boxes and images, but not tables.
If you select a box style in the box properties dialog, or apply one using the Formatting Palette, the box will reflect any changes in the box style. For example if you defined a ‘Warning’ box style and applied it several times in your project, you could decide to change the border and background colour in the box style, and it would automatically be reflected in the boxes that use the style, assuming that the changed attributes weren’t overridden by the individual boxes. Images that have box styles are similarly updated.
Currently, you can’t specify within a box style what paragraph styles should be applied to box content.
To apply a box style to a text box or image using the Formatting Palette, show the available box styles by selecting Box styles or All styles in the drop-down control. Then select the image or box, and double-click on the box style in the palette.
If the current editing position is inside a text box, but nothing is selected, the style will be applied to the text box.
If the current editing position is not inside a text box, and nothing is selected, double-clicking the box style will create a new box with this style. You can also force text box creation instead of style application by holding down the control key (or on Mac, command key) while double-clicking.
TIP: If the content of your box is formatted strangely, check the paragraph style for the paragraph containing the box. Set the style for the paragraph to something innocuous such as ‘Normal’ so the box doesn’t pick up unwanted attributes.
Text boxes should work well in most ereaders. Older Kindle ereaders supporting only KF7 (‘Kindle DX’ mode in the now-obsolete Kindle Previewer 2) will not show boxes unless you use the configuration option Emulate boxes using tables, since KF7 implements tables better than it does boxes.
Adobe Digital Editions has a unique problem when rendering large boxes, as it also does with tables. In order to support centred boxes in ADE, the CSS attribute ‘display:inline-block’ must be used. However, boxes with this attribute do not span multiple pages – the part of the box that isn’t displayed on the first page will simply be lost. To work around this conundrum, set the configuration property Maximum box words for inline-block to the number of words above which you consider a text box to be large and in danger of being rendered across page boundaries. The default is 200 words. Boxes larger than this size will omit the ‘display:inline-block’ attribute to favour correct rendering across pages over centring. Centring should work correctly on most other ereaders without the need for this attribute, since we also use ‘margin-left:auto;margin-right:auto’ to implement centring.
A problem with the case when ‘display:inline-block’ is not used, is that a text box will not automatically shrink to fit its content. If you do not care about ADE compatibility, you can set Box word threshold for inline-block to a large number so that it always uses ‘display:inline-block’. Otherwise, you can make sure that when a text box needs to be narrower than the surrounding text, you give it an explicit width, such as 50%.
Note that if you have the configuration option Maximum box words for inline-block set to a non-zero value, the generated HTML box may have an extra paragraph tag around it in order to support centring and shrink to fit. Set the option to zero to ensure that a box that is alone in a paragraph is not enclosed within an outer paragraph, which can cause problems in some situations, including unexpected text sizes.
By default, text boxes are stripped of their height value when creating an ebook. This prevents the overflow of content from a box that is too small for its text; when you import text boxes from word processor documents, they will often specify the box height, but this is not optimal for generated ebooks where the text size and font may vary from how the document was originally created. You can switch this behaviour off by clearing the configuration option Omit box height.
You now know all about Jutoh text boxes. The next chapter describes tag objects for advanced markup; you can skip this if your needs are relatively simple.
Contents | Start | End | Previous: Chapter 14: Working With Tables | Next: Chapter 16: Working With Tag Objects