
Contents | Start | End | Previous: Chapter 16: Working With Tag Objects | Next: Chapter 18: Creating Fixed Layout Books
This chapter describes how Jutoh can help you add audio narration to one or more documents in your book, using Epub 3 media overlay (SMIL) files.
Synchronised audio narration, where content is highlighted as the audio track progresses, is appropriate for some kinds of books, in particular young children’s picture books. An audio track may also enhance accessibility for disabled readers.
At present, narration works with Apple Books and Kobo for fixed layout books only; some Epub 3 readers such as Readium will also handle narration for reflowable books.
You will need to set your configuration option Epub version to 3.
Here’s a procedure for adding narration (you may choose to use different tools or ordering):
Mark up your document with spans and identifiers.
Add your audio files to the Jutoh project.
Create a label file in the audio editor Audacity to mark up clip timings that correspond to span identifiers.
In Jutoh document properties, import the labels file to a ‘timing set’.
Specify a character style for highlighting narrated content.
Compile the project.
These tasks are described further below.
Jutoh will need to match each segment of text with a clip in an audio file. So first you need to mark up your document with ‘span’ tags, either manually using the Object Palette, or automatically using the command Book | Bulk Bookmark Management. This can add spans around words and sentences, complete with generated identifiers. You can manually fix spans that haven’t been placed correctly.
Use the Inspector Palette to view all the identifiers in the document (both object ‘Ids’ and bookmarks). This is particularly useful when you’re using paragraph identifiers, which are not visible in the editor. The screenshot below shows marked-up content for the first few paragraphs of Moby Dick, with the identifiers and their context listed in the Inspector. To show span tag identifiers next to each tag as in the screenshot, right-click over ‘span’ in the Object Palette, click on Edit Object in the menu, and set the Display mode setting to Show all valid properties.
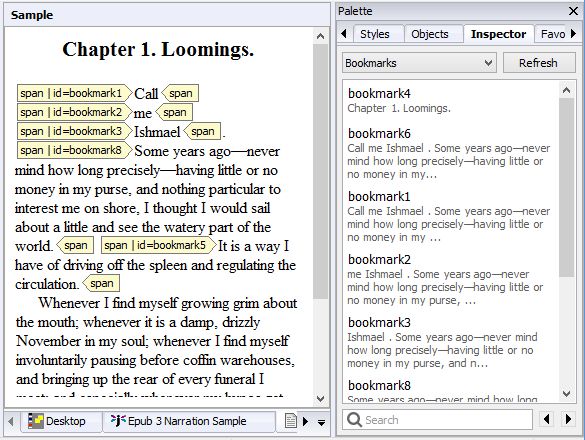
Marked-up content and the Inspector showing bookmarks
For each audio file – you can have several per document if you wish – create a media document from the Documents toolbar button and specify the audio file. Typically the file will be in MP4 format. Note that if the audio file changes, you will need to import the file again: Jutoh doesn’t automatically use the changed file. An example media document within Jutoh is shown below.
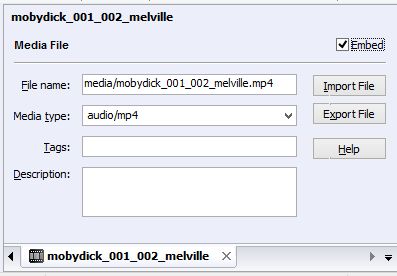
An audio file as a media document in Jutoh
Audacity is a widely-used audio editor program available for Windows, Linux and Mac. (Fun fact: Audacity uses the wxWidgets GUI library also used for Jutoh; wxWidgets was created by Jutoh’s author.) Audacity is recommended by Apple for creating label files for media overlays, in case that gives you extra confidence. Here’s a screenshot of Audacity with an audio track and label track:
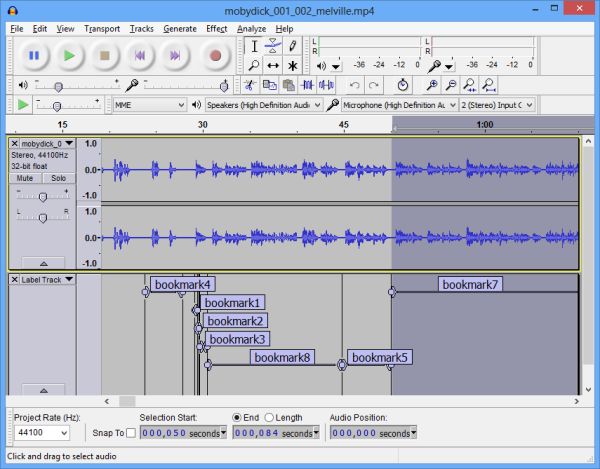
Audacity with an audio track and label track
Run Audacity, and open the narration audio track. If the audio file is in a format not supported by Audacity, you may need to convert it to (for example) WAV or MP3 first. You can use software such as FFmpeg to do this, or you can use an online file converter.
Now add a label track in Audacity using Tracks | Add New | Label Track. Use View | Zoom In (Ctrl+1) as many times as you need to view enough detail. At high zoom levels, you will be able to see roughly where word, phrase and sentence boundaries are by the appearance of the wave form.
To add a label, define the clip start and end positions using a drag movement or more precise dragging of the start and end positions. You can use Audacity’s snap-to-nearest-label option to make it easier to create consecutive audio segments. Press Play to see if you have got the clip position right. When you have, use Tracks | Add Label at Selection (Ctrl+B) and start typing. For each span identifier in your Jutoh document, add a label with the same name in the Audacity label track. When doing this, you can refer to Jutoh’s Inspector Palette with its list of bookmarks (including span identifiers) and their context.
When you have finished marking up the clips, save the label track as a text file using File | Export Labels. You can have several label tracks for a document if you wish.
The Jutoh book section properties dialog has a Media page within which you can define ‘timing sets’ for narration synchronisation. A timing set is simply a list of start and end times (clips), each with a label. The label will identify which part of the content the clip applies to. As noted above, you can have as many timing sets as you wish for each document, since you might have several audio files for the document, and corresponding label files. A timing set in Jutoh corresponds to an Audacity label file, but we give it a neutral name ‘timing set’ since you may define your timings in a different way, such as adding each one manually (though this would be laborious!)
Here’s a screenshot of the Media page with a timing set defined:
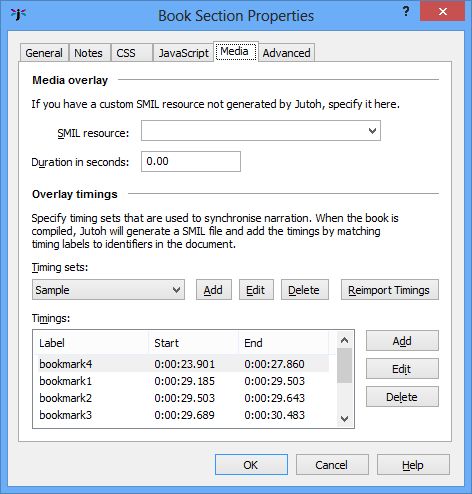
The media page of the Book Section properties dialog
When you add a timing set by clicking on Add next to the drop-down list of timing sets, you can specify the Audacity label track file name, and the associated audio resource within the Jutoh project that you have added (or will add) to the project.
Jutoh will import the timings when you create the timing set, and also if you edit the timing set. You can click the Reimport Timings button to reimport the label files for all the timing sets in the document. Currently you can’t do this per project, only per section document.
Edit your project properties and in the Accessibility page, click on the Speech tab. In the field for Character style for narration highlighting, specify a character style that will be used to highlight the text that is currently being narrated. You can leave this blank to use the ereader default.
When the ebook is compiled, Jutoh will create a SMIL file for each document that reflects both the structure of the document and the identifiers that specify the timing for that content. You can look at the generated files by using Book | Examine and clicking on the .smil file(s).
You can test the book using Readium add-on for the Chrome browser, or on Apple Books or a Kobo device or app if you have created a fixed-layout book. On some systems, you can click on or touch a region of content to start reading immediately from that point.
We’ve seen how we can add audio files and synchronise them with book content, with a little help from the third-party audio editor Audacity. For Apple Books, we can only use narration in fixed layout books: so let’s look at that next.
Contents | Start | End | Previous: Chapter 16: Working With Tag Objects | Next: Chapter 18: Creating Fixed Layout Books