
Contents | Start | End | Previous: Chapter 4: Working With Projects | Next: Chapter 6: Editing and Formatting Content
In Chapter 2: Getting Started, we briefly showed how to import an existing file into Jutoh. In this chapter we will cover this aspect in more detail, including what the best import format is and why.
If you are eager to get started and don’t want to read the rest of this chapter right now, just use the toolbar command Quick Convert  or File | Quick Convert, choose a file, and let Jutoh create a new project from it. This avoids the New Project Wizard, which can be a bit daunting for the beginner; but if you discover you need to adjust detailed settings for the import (for example, how to split the file into chapters), you can try importing again using File | Import | Reimport Project. You can still adjust aspects such as metadata (such as the title and author), and your cover, whichever way you import your file. And of course, since Jutoh is an editor and not just a file converter, you can edit and format the content of your book within Jutoh after import.
Jutoh can import from several different kinds of file, but with varying quality depending on the format. These are the supported formats:
Microsoft Word XML (DOCX): this has been Microsoft Word’s native file format for some years, but older versions of Word can still be made to open and save DOCX – see the Introduction for more information.
OpenDocument Text (ODT): this is the native file format of the free OpenOffice Writer and LibreOffice Writer word processors.
Plain text: Jutoh can import from a plain text file or folder full of text files, though there will be no fancy formatting initially, since there is none in the original text.
HTML: Jutoh can import in a limited way from HTML; some formatting will be lost, although of course most can be put back by applying styles within Jutoh.
Epub: Jutoh can import from an existing Epub file, with the same HTML restrictions as mentioned above.
Although Jutoh can import from these formats after a blank project has been created, it’s usually best to import within the New Project Wizard because the wizard helps you split the file into sections.
Because Jutoh’s representation is different from each of the native file formats, it’s inevitable that some information will be lost in translation, for example fancy Word table borders, but you should rarely find that this is a problem.
Let’s look at the input formats in more detail, and how to import from each format in the Jutoh New Project Wizard.
The majority of users, especially on Windows and Mac, will probably have their manuscript in Microsoft Word format. If you’re using Linux, you’re more likely to have an ODT file. ODT format originally started as SXW (the native format of StarOffice which became OpenOffice and then LibreOffice). Now it’s a recognised international standard and supported in other word processors including recent versions of Microsoft Word. If your word processor doesn’t support ODT, then you can download a copy of LibreOffice or OpenOffice for free and use it to convert from what your word processor outputs, to ODT. You might save from your word processor in RTF, for example, before loading it into LibreOffice or OpenOffice and saving as ODT.
Jutoh recognises the styles, footnotes, index entries and bookmarks in an ODT or DOCX file and therefore these are the best formats to use for getting your existing book into Jutoh.
These are the steps to take when importing a DOCX or ODT file. First, use File | New Project or the New toolbar button to create a new project.
Steps 1-3: enter metadata, a project location and layout choice as per Chapter 2: Getting Started.
Step 4: you can leave the import and style options as they are. However, you may wish to adjust the Resize images to max option if you want pictures to be resized differently than the default (or not resized at all – resizing can be done at book generation time). Also, page breaks will be removed from the imported file by default, since book sections imply page breaks. Change Remove any page breaks if you need to retain page breaks.
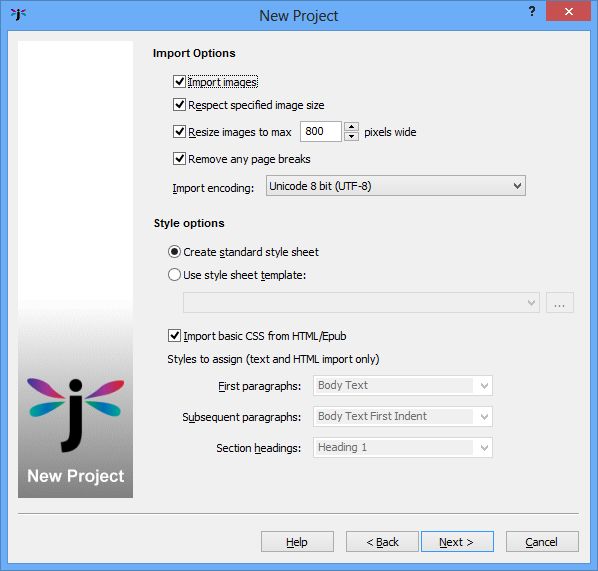
Step 4: import and style options
Step 5: in the Import Method page, click on From an existing file containing all sections and specify the ODT file to import from.
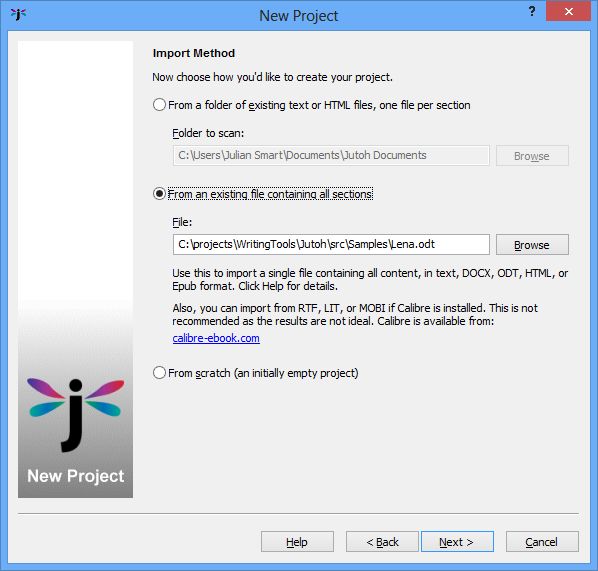
Step 5: specifying the import method and file
Step 6: in the Single File Import page, tell Jutoh how to split the file into book sections, which is important for an ebook. You can split the file using one of three methods:
By style: specify the heading paragraph styles that indicates the start of a section. Specify an asterisk to match against multiple styles, and separate multiple heading style patterns by the pipe character (‘|’).
By pattern: specify a pattern to match against heading text. For example, you might label each chapter with the prefix “Chapter”. Again, use an asterisk to indicate multiple characters to match, for example “Chapter *”.
Using page breaks: Jutoh will use page breaks to split the document.
Jutoh will show a preview of some of the section headings it has found based on your current split settings. It will make an initial guess. If you cannot persuade Jutoh to find suitable split points, you can split your book sections manually later. Or, you might decide it’s easier to edit the original ODT file to let Jutoh find split points. In this case, you can click on Back and then Next again to have Jutoh reread the changed ODT file.
You can also adjust a few other options, such as removing unused styles (the default), and discarding empty paragraphs (also the default). But the defaults are usually best.
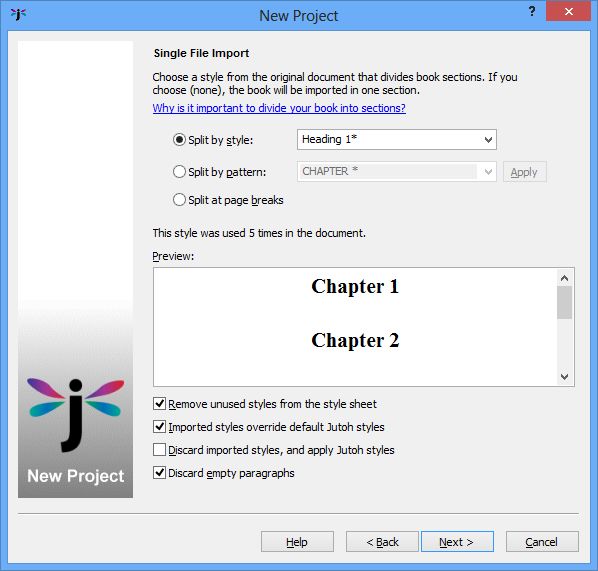
Step 6: splitting the document
Step 7: in the final page, you can choose a cover design, either one of Jutoh’s templates or an existing image file. Click on Templates to see the selection of designs available, or click Design to edit the design using the cover designer (see Chapter 8: Creating Your Cover Design). You can of course change your mind about the cover design at any time after you’ve created your project, so it doesn’t matter too much what you choose in this page.
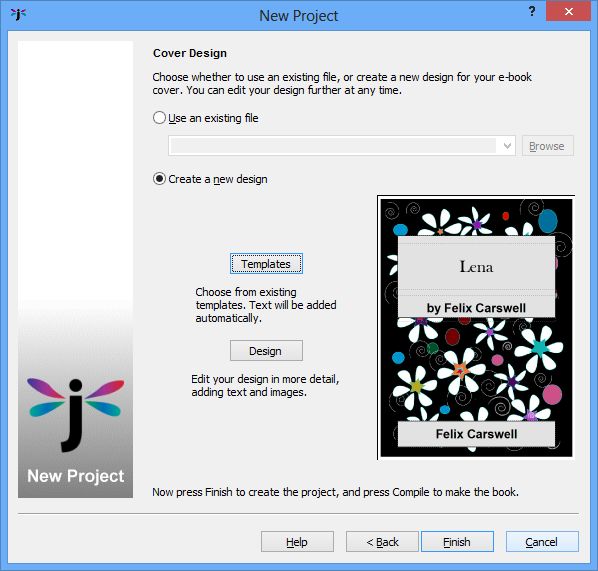
Step 7: choosing a cover
Now press Finish, and the ODT file will be imported, and (if possible) split into separate sections.
 Your usual word processor may have hidden your use of ad hoc formatting; for example, it might have reported “Normal” in its style list when actually you had applied ad hoc styles such centring and paragraph spacing to that basic style. In Jutoh, you’ll see ad hoc formatting reflected in automatic styles in the style list – that is, styles containing a ‘+’ symbol such as “Normal + Centre Alignment”. You are strongly advised to replace ad hoc formatting with named styles, as detailed in Chapter 12: Working With Style Sheets.
 If not all images are imported from your ODT file, it may be because they are in a non-standard format called SVM. Jutoh (and most other applications) are unable to convert these, but if you save your original file as an HTML file from your word processor, writing GIF files, then when importing from ODT Jutoh will try to substitute any missing SVM image files with the GIF files. Another solution is to insert the original images from files instead of pasting from the clipboard; or copying and pasting the missing images into Jutoh manually.
Plain text can contain no formatting, and also generally doesn’t contain an indication of what ‘character encoding’ it has been written in, which is the key for an application to interpret how the data is converted to actual characters. The encoding is therefore specified by the user when importing. In general, UTF-8 is the best encoding to use when saving from a word processor since it can handle any language.
If you specify a folder of text files, each file will be used for a separate Jutoh section. If you specify a single text file, Jutoh will take you to a wizard page that lets you choose criteria for splitting up the file. You may wish to edit your original text file to make it easier for Jutoh to split it into sections – for example, labelling each chapter “Chapter...”, or adding a separator between chapters, such as “---”.
The steps for importing text are mostly the same as for ODT above, the main difference being the Single Text File Import page that appears after you have chosen your text file.
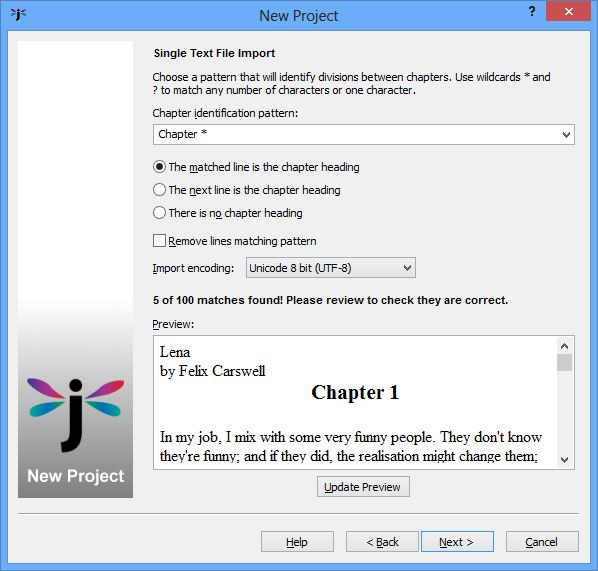
Splitting a text file
In this page you can specify a pattern to identify the start of chapters, including asterisks to denote ‘match zero or more characters’. If you need to match actual asterisks, prefix them with a backslash; for example to match “***” you can write “\*\*\*”.
You can also choose between the following mutually-exclusive options for telling Jutoh more about the matched text:
The matched line is the chapter heading: choose this if your chapters are easily identifiable, as in the above example.
The next line is the chapter heading: choose this if the text being matched is simply to denote a division (for example, “---”) and the next line contains the actual heading.
There is no chapter heading: choose this if there is no chapter heading, just sections separated by some matchable text.
Check Remove lines matching pattern if you don’t want to keep section separators, such as “---”. Don’t check this if you’re matching against chapter headings.
Specify the Import encoding to match the encoding of the text file, as used by the tool that created the text file originally. Usually UTF-8 is the best format to use.
If you want to change the styles that Jutoh applies to the imported text (for initial paragraph, subsequent paragraphs, and section headings), you can change them in the Import and Style wizard page (see Step 3 above).
If you have a number of text files, one per chapter, you can select the folder instead of a single file, and you will be presented with the File Conversion Options page:

Multiple-file conversion options
You can specify whether to take the title from the first line of each file, and the file encoding. You don’t have to tell Jutoh how to split the content because it’ll simply create one section per found file.
Jutoh can import from a single HTML file, or a folder of several. As with plain text import, Jutoh will allocate a section per HTML file if importing from a folder; if importing from a single file, the same options will be presented as per DOCX or ODT import, allowing you to specify a pattern to use for recognising individual sections.
As already mentioned, HTML does not preserve all formatting, because it can only do a basic job of converting CSS (HTML styles) to Jutoh styles. CSS works very differently from Jutoh styles, so there can never be an exact conversion. You can either clean up the content and styles after import, or you can clear the option Import basic CSS from HTML/Epub and specify the styles for the first and subsequent paragraphs after each heading. This way, you can use import as a kind of cleanup mechanism, to convert complex HTML to a simple Jutoh project (and then back to HTML/Epub/Mobipocket).
Jutoh will attempt to read any images in the HTML. Footnotes and alphabetical indexes will be imported as standard HTML implemented using links since HTML does not define these explicitly. If you need these to be preserved, use DOCX or ODT import.
Where an HTML link defines both an anchor and a reference in the same “a” tag, a bookmark symbol is generated just before the linked content, since Jutoh can’t handle both simultaneously. This will be generated as an empty bookmark followed by the linked content.
You can specify an Epub as a single file in the New Project Wizard. Since Epub files contain HTML, the same import restrictions apply as for HTML. However Jutoh will be able to recreate the structure of the Epub accurately, and will use the metadata it finds in the Epub.
You can still import from text, HTML, DOCX, ODT and Epub at any time after initially creating your project, using the File | Import | Import Document command. However, you will not be assisted in splitting up your imported file; you will need to do it manually, for example with Edit | Split Document, except for Epub files which will use the found structure and will give you the option to import the whole Epub under a new folder – useful for merging several volumes into one book.
Jutoh makes it easy to duplicate an initial import operation, for example if you changed the original file or decided to use different settings. Use the File | Import | Reimport Project command to show the New Project Wizard using the same default settings as you used originally, deleting the current project content before importing the file again.
In this chapter you have learned how to import your existing work. Next, we delve into the details of editing and formatting content.
Contents | Start | End | Previous: Chapter 4: Working With Projects | Next: Chapter 6: Editing and Formatting Content